How to replace a bicycle chain in 5 Minutes?

Out of all the major components on your bike, your chain will wear out the quickest and need replacing the most often. Why? Despite being made of hardened steel, But the more you pedal, the more the chain's internal pins and rollers stretch and wear. As the wear worsens, the chain no longer fits perfectly over the cassette cogs and crankset chainrings. That causes the bike to shift poorly and prematurely wear down the rest of the drivetrain.
You can slow down drivetrain wear by staying on top of maintenance, such as cleaning your chain regularly and checking it for wear using a chain-checker. If you allow the chain to wear out past its limit, you’ll then likely need to replace your cassette and possibly chainrings.
Luckily, replacing a bike chain is relatively easy with some basic tools.
Time taken: 15 mins
Tools Required:
- Protective gloves (not essential)
- Chain breaker tool
- Quick link pliers (if your chain uses a quick link)
- A new chain (compatible with the number of sprockets on your bike)
- Chain lubricant (not essential)
1. Preparation before replacing:
Step1: Check Chain Compatibility
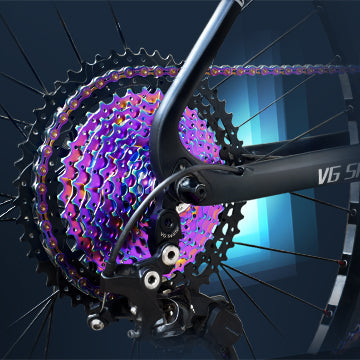
Chains come in different speeds and are often drivetrain-specific. Make sure to check the new chain is compatible with your drivetrain. Please don't worry, Except Shimano SLX, Micro Splin & SRAM XD,XDR, GX,X01,X11 incompatible. VG Sports chains work with other SRAM&Shimano sizes. If you want to make sure about it to avoid troubling matters, you can contact our customer service team with your bicycle model. If you buy bicycle chain from other brand, we will advise you make sure this point before purchasing. VG Sports makes a great and often less expensive alternative.

Step2: Tune Your Bike
Look at how the chain threads around the rear derailleur pullies. Remember that, because that's how you want it when you replace the chain later. Also notice how taut the chain is. If this is your first time replacing your chain, it's smart to take a photo for reference. See if your chain has a quick link to choose the suitable way for removing the chain. If your bike's cassette is filthy, now is the time to remove the rear bike wheel so you can clean or replace the cassette.

2. Project step by step:
Step1: Remove the Old Chain
If your chain has a quick link, remove it by squeezing both sides of the link toward each other with quick-link pliers. Squeeze the pliers and the link should come undone. This can sometimes require force, particularly on non-reusable quick-links. When disconnected from the chain, the quick link should be in two halves, with a pin on either side.


If the chain doesn't have a quick link, use a chain breaker to remove one of the connecting rivets. Insert the chain link into the slots, then line up the tool's knob with the chain rivet. Turn the dial, forcing the knob into the rivet hole. Keep turning until the rivet pops out.

With the quick link or joining pin now removed, you can carefully remove the chain, either pedalling it so it comes off the chainring or feeding it through the rear derailleur. You may want to use a cloth or rag to protect the driveside chainstay and stop the chain from slapping on it as it’s removed.
Step2: Size the New Chain
Measure the new chain and the old chain next to one another. Rather than put the old and new chain together side by side, it’s best to match the number of outer and inner links together, bearing in mind the old chain will have elongated through wear. This can easily add up to a full chain link’s length, or more.
Having noted the link that you need to sever, it’s time to grab the chain tool again. Drop the link you want to work on in between the jaws of the tool. Turn the handle until the pin starts to push the centre of the link. Be careful that everything is aligned so as not to damage the tool.

Step3: Install the New Chain
When installing a chain, check to see if it’s directional. There may be writing on one side of the chain, or there might be an arrow indicating the chain’s direction of travel. Thread the chain into the rear derailleur by pulling it down across the right half of the top pulley and the left side of the bottom one. Drape the new chain over the smallest chainring and the smallest cog on your cassette.
Use a chain hook to keep the chain connected and taut long enough to install the quick link or insert the connecting rivet. Using the quick-link pliers, position the jaws of the tool inside the two pins of the quick link and spread them apart. You should hear a click or feel them pop into place. Use a new quick link with the new chain. Many companies include the quick link with the chain, but if not, you can pick one up for a few bucks.
For chains that use a joining pin, you may want to apply some chain lubricant to the joining pin, prior to installation. The joining pin installs into the chain from the inside face of the chain towards you. When the pilot of the pin is broken off at the end, it can leave a small burr and installing the pin in this direction avoids the burr contacting the inside of the cassette teeth, where it could create additional noise. Take the two ends of the chain and insert the pin between them. If you’re finding it difficult to join both ends of the chain together due to the tension of the rear derailleur, you can either hold the derailleur cage down with one hand, or use a bent spoke or zip tie. Use the chain tool to drive the pin in, being careful to stop once it is seated. There will be two points of resistance and you want to make sure the depth is matched with the neighbouring rivets. When the pin is in place, you can snap off the end with pliers. Many chain breakers have this function built into the tool.
Once the chain is connected, you should run your bike through a full range of gears to make sure it’s working correctly.